Dialog tutorial
1 Overview
2 Putting the action in the Plugin
3 Using the MDIDialogBuilder
4 Using the DefaultMDIDialogBuilder
5 Showing a simple message dialog
6 See also
2 Putting the action in the Plugin
3 Using the MDIDialogBuilder
4 Using the DefaultMDIDialogBuilder
5 Showing a simple message dialog
6 See also
Overview
For this tutorial, we will reuse what we have done for the basic tutorial.The analysis action will be performed in the Plugin using the Dialog framework.
Putting the action in the Plugin
In the basic tutorial, the analysis action is performed in the application Menu factory.We will remove it from the factory an manage it in our Plugin. The code in the Menu factory will be:
   public class SimpleMenuFactory extends AbstractMDIMenuFactory {
     protected void initMenus() {
       JMenuItem exitItem = new JMenuItem(getDefaultExitAction());
       filemenu.add(exitItem);
       openmenu = new JMenu("Open");
       filemenu.add(openmenu);

          JMenuItem analyseImageItem = new JMenuItem(new AnalyseImageAction("Analyze"));
          filemenu.add(analyseImageItem);

       JMenuItem aboutPluginsItem = new JMenuItem(getPluginsMenuFactory().getAboutPluginsAction());
       helpmenu.add(aboutPluginsItem);

       staticMenuKeyMap.put(PluginElementTypes.OPEN_ACTIONS, openmenu);
       getPluginsMenuFactory().registerMenus(staticMenuKeyMap, null);

       Mbar.add(filemenu);
       Mbar.add(helpmenu);
     }
   }
Now we can add the code for the action in the Plugin:
   public class OpenImagePlugin extends AbstractSwingMDIPlugin {
      public static final String OPEN_IMAGES = "OpenImages";
      public static final String OPEN_IMAGES_DESC = "Open Images Plugin";
      private AbstractAction importImageAction;
      private AbstractAction analyzeImageAction;

      public OpenImagePlugin() {
      }

      @Override
      public String getPluginName() {
        return OPEN_IMAGES;
      }

      @Override
      public Object getPluginProperty(String prop) {
        switch (prop) {
          case PluginElementTypes.PROPERTY_DATE:
            return "undef";
          case PluginElementTypes.PROPERTY_DESC:
            return OPEN_IMAGES_DESC;
          case PluginElementTypes.PROPERTY_VERSION:
            return "0.1";
          default:
            return null;
        }
      }

      @Override
      public void register(MDIApplication app) throws Exception {
        super.register(app);
        importImageAction = new ImportImageAction(app, "Image");
        analyzeImageAction = new AnalyzeImageAction(app, "Analyze Image");
      }

      @Override
      public Object getStaticMenuElements(String menu) {
        if (menu.equals(PluginElementTypes.OPEN_ACTIONS)) {
          return importImageAction;
        } else if (menu.equals("Tools")) {
          return analyzeImageAction;
        } else {
          return null;
        }
      }
   }
And the code for the
AnalyzeImageAction class which is a copy of the code which was in the basic tutorial:public class AnalyseImageAction extends AbstractMDIAction { public AnalyseImageAction(String name) { super(appli, name); this.setDescription("Analyse", "Analyse Image"); } @Override public void run() throws Exception { GUIApplication gui = (GUIApplication) app; if (gui.getSelectedProperties() != null) { BufferedImage image = (BufferedImage) gui.getSelectedProperties().getObject(); JDialog dialog = new JDialog(gui.getApplicationWindow(), gui.getSelectedProperties().getName(), false); Container pane = dialog.getContentPane(); pane.setLayout(new BoxLayout(pane, BoxLayout.Y_AXIS)); pane.add(new JLabel("Width: " + image.getWidth())); pane.add(new JLabel("Height: " + image.getHeight())); pane.add(new JLabel("Type: " + image.getType())); dialog.setSize(200, 100); dialog.setVisible(true); } } }Our code is very specific, and the dialog is really basic:
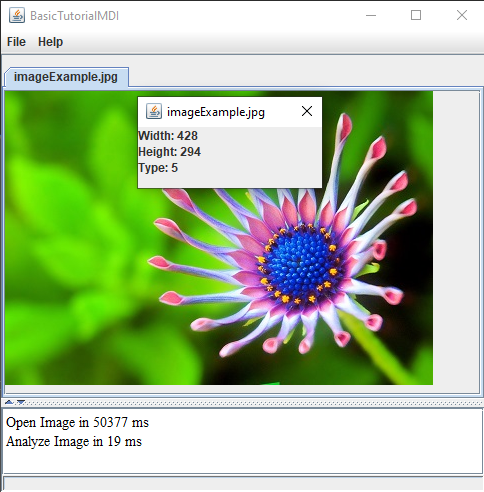
In this case the dialog is completely handled in this code, for example:
- There is no button to dismiss the dialog, it is just made invisible when clicking on the button on the header of the dialog window
- The layout of the components in the window is also in the code,, and the resulting output is basic and not very pretty, but making it better would involve lot more code
- If we want to have consistent dialogs for all our application, we are on our own
Using the MDIDialogBuilder
Main Article: MDIDialogBuilder
The framework offers a way to create consistent dialogs in all our applications. A direct way to do it is to use the MDIDialogBuilder class.
Basically the MDIDialogBuilder has a MDIDialogBuilder.createDialogContent() method which creates the main panel of the dialog. The rest of the dialog is handled by the framework. Several methods of the interface allow to specify how we want our dialog to appear.
First let's implement the
MDIDialogBuilder interface:private class AnalyseImageMenuBuilder implements MDIDialogBuilder { private final BufferedImage image; public AnalyseImageMenuBuilder(BufferedImage image) { this.image = image; } @Override public JComponent createDialogContent() { JPanel pane = new JPanel(); pane.setLayout(new BoxLayout(pane, BoxLayout.Y_AXIS)); pane.add(Box.createVerticalStrut(5)); pane.add(new JLabel("Width: " + image.getWidth())); pane.add(Box.createVerticalStrut(5)); pane.add(new JLabel("Height: " + image.getHeight())); return pane; } }We can use this class in our
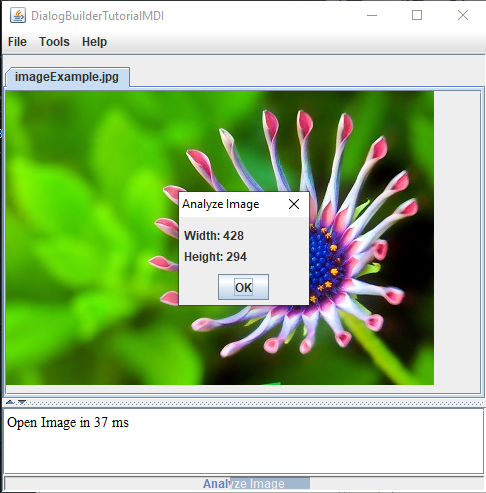
AnalyzeImageAction:public class AnalyseImageAction extends AbstractMDIAction { public AnalyseImageAction(String name) { super(appli, name); this.setDescription("Analyse", "Analyse Image"); } @Override public void run() throws Exception { GUIApplication gui = (GUIApplication) app; if (gui.getSelectedProperties() != null) { BufferedImage image = (BufferedImage) gui.getSelectedProperties().getObject(); AnalyseImageMenuBuilder builder = new AnalyseImageMenuBuilder(image); gui.showDialog(builder, MDIDialogType.UNIQUE_INSTANCE); } } }We can also customize our builder to name the dialog header:
   private class AnalyseImageMenuBuilder implements MDIDialogBuilder {
      private final BufferedImage image;

      public AnalyseImageMenuBuilder(BufferedImage image) {
        this.image = image;
      }

         @Override
         public String getDialogTitle() {
           return "Analyze Image";
         }

      @Override
      public JComponent createDialogContent() {
        JPanel pane = new JPanel();
        pane.setLayout(new BoxLayout(pane, BoxLayout.Y_AXIS));
        pane.add(Box.createVerticalStrut(5));
        pane.add(new JLabel("Width: " + image.getWidth()));
        pane.add(Box.createVerticalStrut(5));
        pane.add(new JLabel("Height: " + image.getHeight()));
        return pane;
      }
   }
We have the following result:
Using the DefaultMDIDialogBuilder
Main Article: DefaultMDIDialogBuilder
The framework offers a way to create consistent dialogs in all our applications. Another way to create consistent dialogs using the framework do it is to use the DefaultMDIDialogBuilder class.
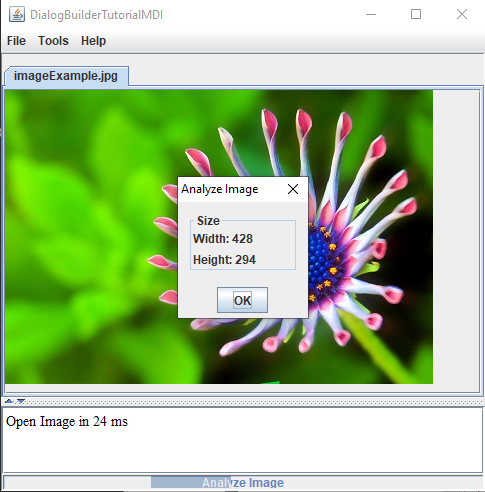
The DefaultMDIDialogBuilder class has several methods allowing to add dialog parts in the dialog, whereas each part will be put in a row.
In our case, we will create only one part, with the width and the height of the image presented in a vertical layout:
   public class AnalyseImageAction extends AbstractMDIAction {
      public AnalyseImageAction(String name) {
        super(appli, name);
        this.setDescription("Analyse", "Analyse Image");
      }

      @Override
      public void run() throws Exception {
        GUIApplication gui = (GUIApplication) app;
        if (gui.getSelectedProperties() != null) {
          BufferedImage image = (BufferedImage) gui.getSelectedProperties().getObject();
             DefaultMDIDialogBuilder builder = new DefaultMDIDialogBuilder("Analyze Image");
             builder.addVerticalDialogPart("Size", new JLabel("Width: " + image.getWidth()), new JLabel("Height: " + image.getHeight()));
             gui.showDialog(builder, MDIDialogType.UNIQUE_INSTANCE);
        }
      }
   }
We have the following result:
Showing a simple message dialog
Main Article: Message dialogs
A very simple way to add a message dialog is to use oe of the following methods:
- The GUIApplication.showMessageDialog(String title, int messageType, boolean isModal, boolean IsResizable, String... messages) method allow to add an OK message dialog, showing optionally an icon for the type of the dialog, and specifying if the dialog is modal and resizable
- The GUIApplication.showMessageDialog(String title, int messageType, String... messages) method allow to add an OK message dialog, showing optionally an icon for the type of the dialog, which is modal and not resizable
- The GUIApplication.showMessageDialog(String title, String... messages) method allow to add an OK message dialog, without an icon, which is modal and not resizable
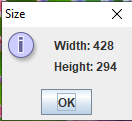
We will do exactly the same thing as in the previous case but with one of these message methods:
      public class AnalyseImageAction extends AbstractMDIAction {
         public AnalyseImageAction(String name) {
           super(appli, name);
           this.setDescription("Analyse", "Analyse Image");
         }

         @Override
         public void run() throws Exception {
           GUIApplication gui = (GUIApplication) app;
           if (gui.getSelectedProperties() != null) {
             BufferedImage image = (BufferedImage) gui.getSelectedProperties().getObject();
             gui.showMessageDialog("Size", MDIDialogBuilder.INFORMATION_MESSAGE, "Width: " + image.getWidth(), "Height: " + image.getHeight());
           }
         }
      }
We have the following result:
See also
- Tutorials: This article is the index of the tutorials
Categories: Swing | Tutorials